learn harmonica
Why Are My Harp Notes Set Out This Way?
‘I do desire we may be better strangers.’ As You Like It (William Shakespeare).
Background
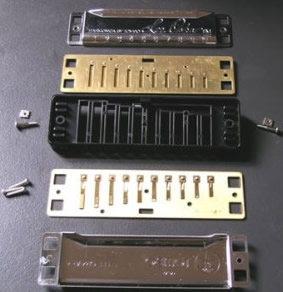 One of the first exercises we learn at the Harp Surgery is playing the major scale from blow 4 up to blow 7 (the mid octave). We use this to develop single note playing and movement around the harp. Simple as it may seem, it’s a great way of learning to navigate the new instrument and to develop an aural awareness of the changes that take place (as we cannot actually see them under our nose). We also use it to warm up at the start of subsequent sessions.
Once the central doh-ray-me is mastered, we then learn to extend upwards from hole 7 to hole 10 (the upper octave) and consider the 10 hole blow bends necessary to complete the sequence. Lastly we apply the process to holes 1 to 4 (the lower octave) and consider the draw bends necessary to complete the pattern. Once we can play the major scale in each octave fluently, including bends, we have the ability to range the length of the harp in 1st position, using it as one homogeneous instrument.
So why is hole 7 back to front?
Coming back to the central scale in holes 4 to 7, there is one thing that sticks out like a sore thumb. Hole 7 is backwards and trips us up every time. For those who are totally new, the mid scale on any 10 hole diatonic runs Read more
Overcoming Beginner’s Twitch
It happens when you first start learning the harmonica. You hit a bum note, so you extend your arms from the elbows to visually locate the right hole on the harmonica, while shaking your head and tutting. By the time you bring the harp back under your nose, the hole’s gone out of focus, you miss your note again, so you tut and extend your arms… That’s beginner’s twitch!
Why do I do it?
Because you’re not keen on playing ‘blind’. That’s perfectly understandable. On every other instrument, you can see what your fingers are doing. On the harmonica your mouth is providing the wind and locating the notes simultaneously. It’s doing what your fingers would otherwise do. That’s just not normal!
What’s the solution?
You haven’t yet developed the navigational systems to locate the right hole without actually seeing it. Think laterally. Ask yourself how you would play the harmonica in the dark? Read more
Perfecting that deep 2 draw bend – Low Rider (War)
All my friends know the low rider
Few students ever arrive at the Harp Surgery knowing exactly how many bends there are or where they’re all located. Some think they do, but on closer inspection find there are gaps in their knowledge or ability. Some can draw bend but not blow bend. Some are unable to bend at all. This is a skill area that almost always needs attention. I firmly believe players of any ability should spend time working on the accuracy of their direct bends. No matter how good you are, those 3 hole draw bends can never be taken for granted.
When you start bending, it always pays to remember the Harp Surgery’s golden rule – it’s ok to make mistakes. That’s why they put erasers on the end of pencils. Perfecting your bends will involve an amount of trial and error. You will learn from your mistakes. And remember this is one of the most significant points of any harp player’s development. Be patient and persevere. You’re breaking into the big time!
The low rider is a little higher
In another article, we spoke about monitoring the accuracy of bends – How do I know I’m bending in tune? My conclusion was that all the electronic paraphernalia in the world is no substitute for using your own ears. Furthermore, instead of learning each individual bend in isolation with an electronic tuning device to determine your accuracy, what better than to pick a fun tune and learn to play the bends in context. You’re a musician after all; if the bend ain’t right, the tune won’t work. Read more
Crossing The Bridge
 In cross-harp (2nd position) it is easy to limit your playing to blues patterns between holes 1 and 6. Accepted, some songs require this, focusing on the wealth of ‘low end’ bends, moods and tones. But what do we do with the ‘top end’ of the harp? It’s banjo country and it’s scary – you just don’t want to go there! This is because the tuning sequence changes in holes 7 to 10 and cross-harp patterns have to change with it. Those favoured low end formulae are rendered useless as everything seems to reverse or shift. Remember how mysterious the low end was when you first picked up the harp? Time, determination, experiment and the sense of adventure all spurred you on to greater things. Breaking into the top end is no different. So it’s back to school…
Stick with it – there’s fun and satisfaction to be had. In due course, 3rd position will have you skipping across the divide like a spring lamb, oblivious to worldly perils. For now, the first steps in linking the bottom and top ends are what we call ‘crossing the bridge’ exercises. Try out these helpful 2nd position licks:
How Do I Know I’m Bending In Tune?
 If I catch you bending, I’ll saw your legs right off..
It’s a fair question often posed by newcomers to the harp, regardless of any previous musical experience. Basically, we all want to know we’re doing something right the first time we try it. Folks often arrive at our workshops under the assumption they’ve nailed their bends, when they actually haven’t completed their journey.
The process starts by quantifying the task. There are twelve regular draw/blow bends on a 10 hole diatonic. 1D’, 2D’, 2D”, 3D’, 3D”, 3D”‘, 4D’, 6D’, 8B’, 9B’, 10B’ and 10B”.
Next we need to learn the skills necessary to achieve each bend. On first encounter each reed has its own distinct response. In time you will grow used to, and learn to accommodate, these idiosyncrasies. You can find comprehensive instructions for playing draw bends and blow bends in our Harp Skills section (top menu). Read more
